Tired Of The Same Old Shit?
Learn How To Make Your Own Icons In Windows
Windows offers a variety of icons but what if you don't like them? Well, you can make your own. You will need an image editor and internet connection
Step1: Create an image in your favorite image editor. My personal favorite is Paint.Net. This is a free program that offers a wide spectrum of editing options. Give it a try.
Paint.Net has a relatively short learning curve thanks to the simple interface and the great number of online tutorials.
Important note: In order to install Paint.Net you will need .Net Framework.
Let's get started.
Open Paint.net and create an image. (You can also edit an already existing image)
In my case I will edit one my donwloaded pictures.
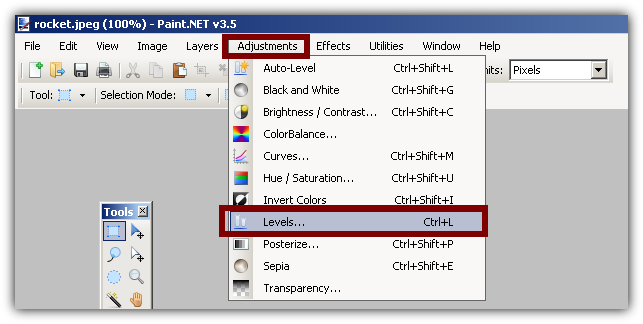
You can do whatever editing you want as long as you are happy with the final results. In this case I will just edit the level of the picture in order to make it a little darker.
You can edit the level by going to Adjustements > Levels
Adjust the levels until you are satisfied with the final result.
After you are done with editing it's time to save the image.
Step2: Convert your image to ico format
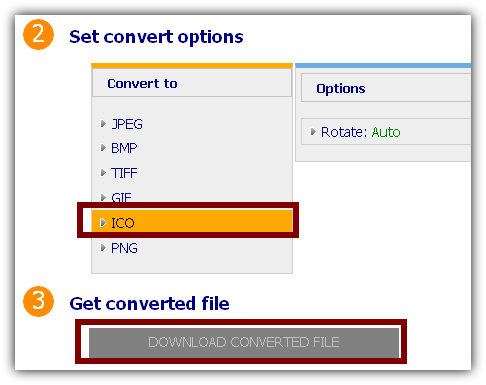
Paint.Net offers you a variety of formats but ico is not one of them. This is not a problem because you can convert image files to ico online.
Select the output format to ico and download your new icon.
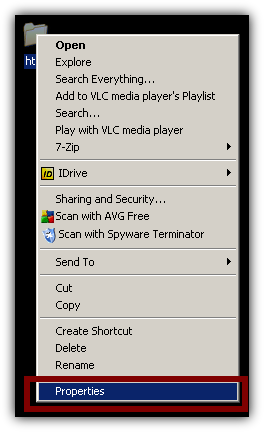
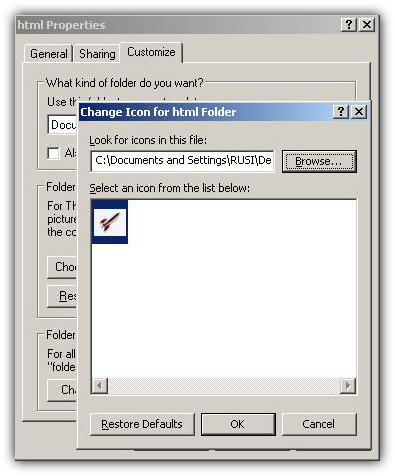
In order to test my new icon I will just right-click on a folder and go to Properties.
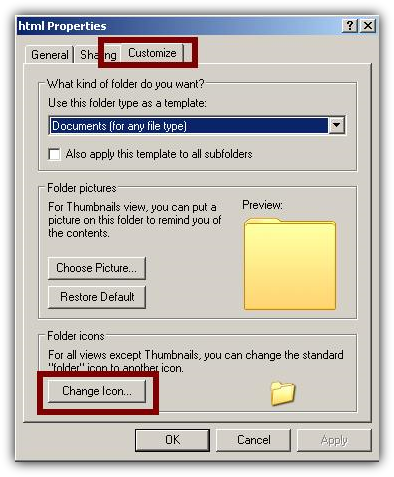
Now go to customize and Change icon.
Important note: I'm using Windows XP here so if you are using Windows 7 the interface is a little different but the steps are similar.
Now click on Browse and select the path of your new icon.
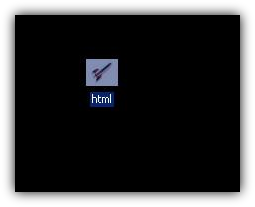
Click Ok two times and you are done. Here's my new icon.